
Using a compass
When many people think about navigating in the outdoors, they think about using map and compass, and worry about the complication of using compass. The first thing to say is you do not need to be proficient with a compass to start orienteering! Beginner courses rarely require much, if any, use of a compass. Once you have started in the right direction you can usually use the major features on the map to keep yourself moving. However, there are a couple of techniques that are useful as you progress on to more difficult courses.
Setting the map
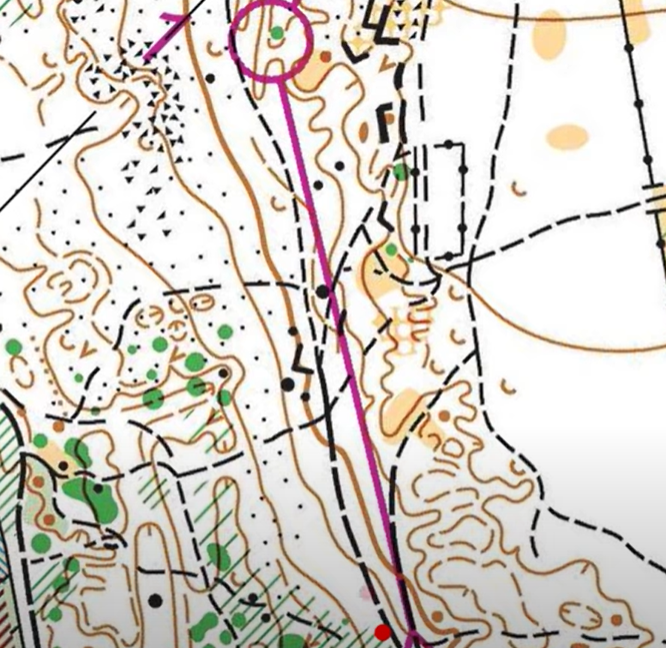
The most basic use of a compass is to “set the map”. The idea is to use the needle on the compass, which always points north, and rotate the map so the north lines point in the same direction. What you now see on the map matches the picture you see on the ground going away from you. See the picture below – the orienteer is at the “start” marked by the red triangle and heading to the control marked by the red circle. They have orientated their map with the compass needle, so the map is orientated to match the forest they see in front of them.
Whenever you change direction, for example at a path junction, or at a checkpoint, you turn the map to realign it to north, so it always matches the picture you see in front of you.
For more information about setting map, check out this short video.
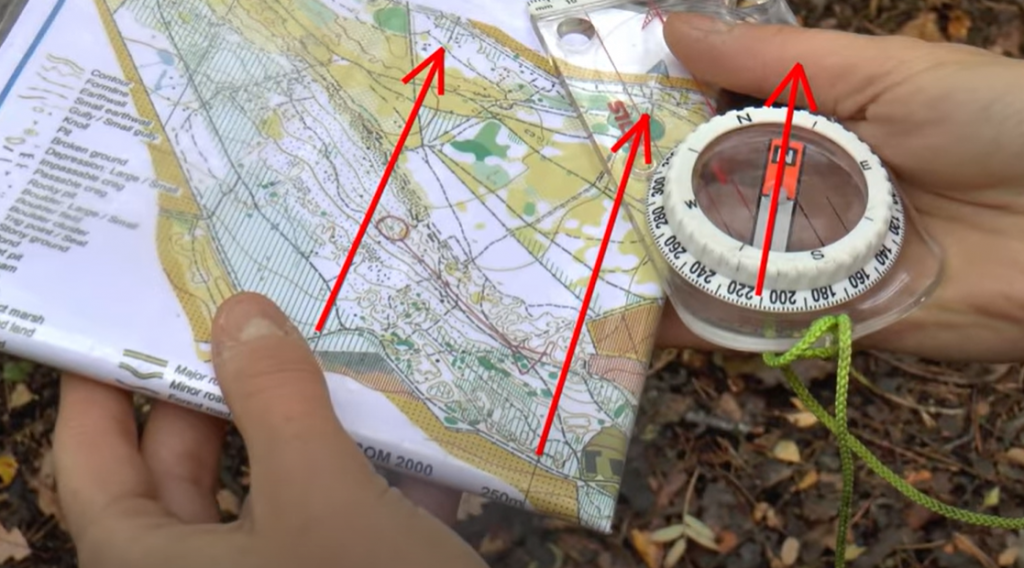
Taking a bearing
Sometimes you want to proceed carefully in a very particular direction. This is where taking a “bearing” using a compass can help. This involves the following steps:
- Put your compass on the map and turn the whole compass it until the lines on the baseplate (or the straight edge of the compass) point in the direction that you want to go, for example along the red line joining two controls. At this stage don’t worry about which way the map is facing, and ignore the circular housing and the needle on the compass.
- Holding the baseplate in place with a finger and thumb, turn the circulate compass housing (or “bezel”) so that the lines inside the housing line up with the north lines on the map. Make sure that the red end of the lines inside the housing are towards the north end of the lines on the map (rather than pointing 180 degrees in the opposite direction). At this stage continue to ignore the needle on the compass.
- Take the compass off the map. Hold the compass so that the arrow at the top of the baseplate is pointing straight out in front of you.
- Keeping the compass pointing straight in front of yourself, turn yourself until the compass needle is parallel to the lines on the housing. Make sure that the red north end of the needle is pointing to the red ned of the lines in the housing (rather than pointing 180 degrees in the opposite direction). Remember, keep the compass pointing in front of you and turn yourself and your body to line the needle with the lines in the housing
- You are now facing in the desired direction. You have used your compass to take a direction on the map and translate it into a direction on the ground. Pick a feature you can see in front of you, for example a distinctive tree and go to it. Then look again for another feature and continue!
This sounds complicated, but you quickly get used to it. Check out this video for a more visual explanation.
Other techniques
There are many other techniques that can be used to navigate around an orienteering course. We highly recommend this playlist from South London Orienteers that covers several other techniques including:
- Attack points
- Aiming off
- Large contour features
- Route choice
- Intricate contours
- Simplification